

Tech/maintenance Hawkes & Son XX Century Soprano overhaul

saxyjt

Saxus Circus Maximus
Messages
5,282
Location
France
So I've been brave or stupid enough to embark in that mission impossible. It all started a few year ago, when I decided to buy this unlikely British made soprano. I don't think I'd do it again, but I was in a GAS spree and found that horn appealing...

It's now been on the bench for a few days. Starting like this:
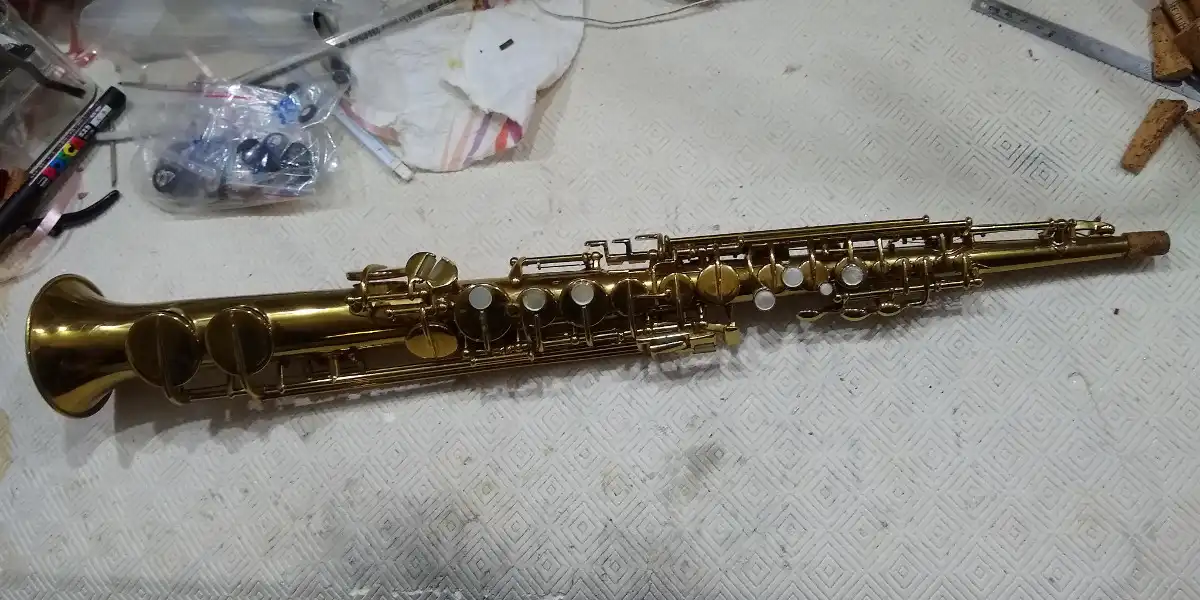
IMG_20190130_171122540x.webp


Then I gave it a good bath or shower, after removing all the keys of course:
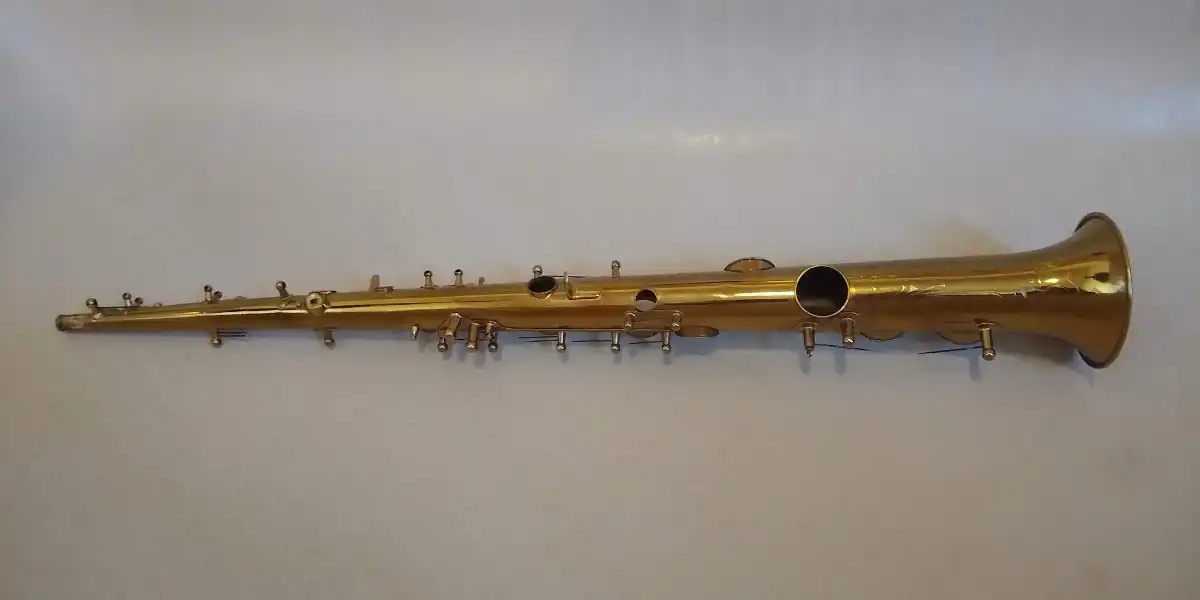
IMG_20190131_110144763x.webp


Then I took it apart and checked the pads I ordered. I have done a pretty good job this time. I guess the tone holes were quite easy to figure after measuring a few of them as it all fell into place rather nicely. At least from a diameter point of view!
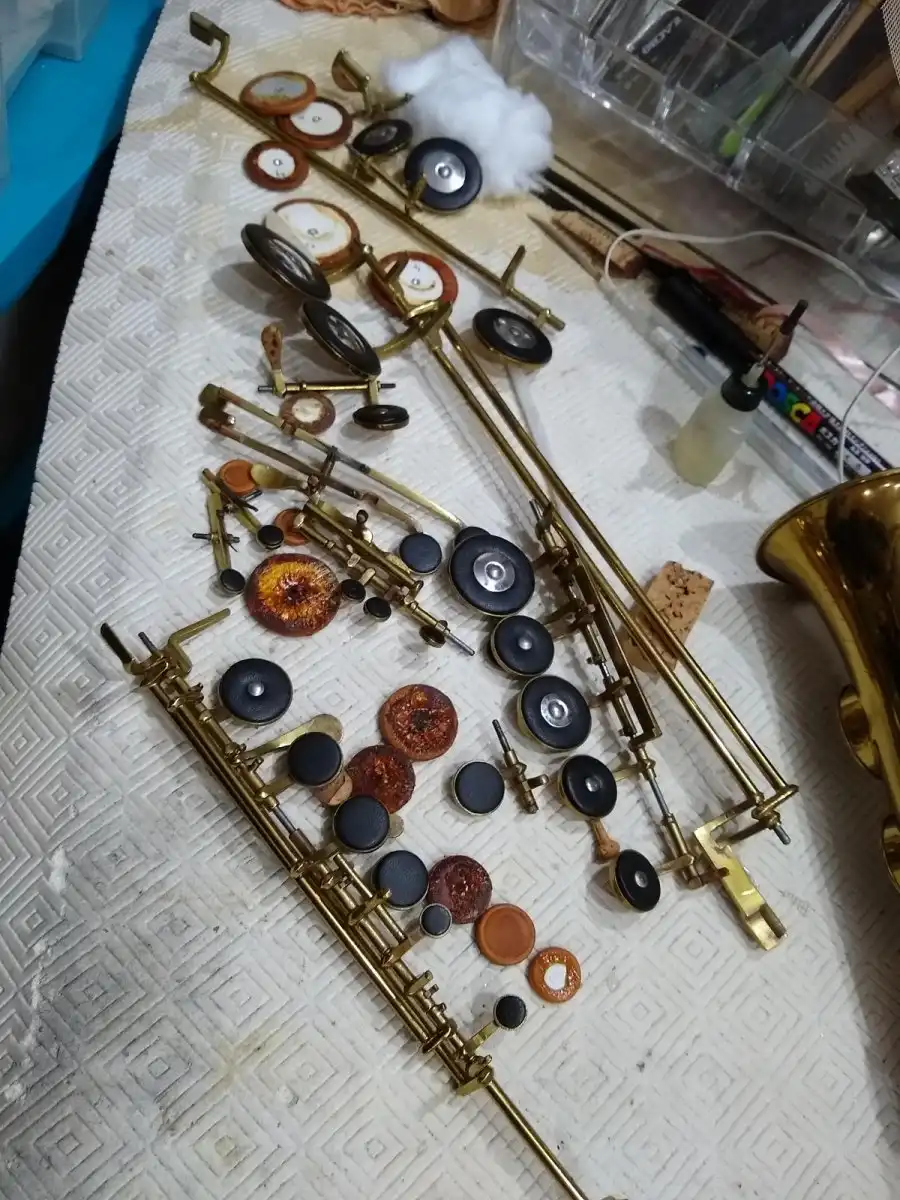
IMG_20190131_153530977x.webp


I went on to dry fit these new pads and evaluate where I'm going to enjoy my next challenges... It looks like some keys don't open much. At least not enough to my liking. That will be an interesting problem to solve!
 
The best way forward that I've found and that applies to at least a few of the keys with the limited key height is to file the key foot. That way, I can still adjust with cork if required. But so, far I used the bare minimum or even a thin layer of adhesive felt just to avoid direct contact between the metal parts and the associated noise and wear.

IMG_20190204_103053730x.webp


I completed the padding job and had a first blow. Pretty much as I expected, the higher stack is not opening enough and the C#/C/B/Bb and A don't sound very nice at all...
 
I have a soprano sax from the 20's, and when some pads needed replacing, the repairer got special thin ones because normal pads are too thick.

It's the second soprano I do and I compared the pads without noticing any real difference. The first one, a more recent Dolnet, went relatively easy. But this one is more complicated also because of the linkage between keys.

It's an interesting learning experience...
 
I have a soprano sax from the 20's, and when some pads needed replacing, the repairer got special thin ones because normal pads are too thick.

I think this is likely to be the case with the Hawkes.
It's unusual to have to file key feet on these horns as they were pretty well put together back in the day. Where such a need arises it usually points to pillars having been knocked out of alignment...or pads being overly thick.

The usual method of assessing pad thickness is to bring a bare cup down over a tonehole and note the point at which the cup and tonehole rims are parallel - but it's often the case that cups have been bent in order to accommodate a thicker pad...with little or no regard to the required height of the action.
 
I think this is likely to be the case with the Hawkes.
It's unusual to have to file key feet on these horns as they were pretty well put together back in the day. Where such a need arises it usually points to pillars having been knocked out of alignment...or pads being overly thick.

You are most certainly right. Looking at the pads didn't reveal particularly thin pads to my neophyte eye. Of course, I am a poor lonesome amateurish guy trying to get away with a cheap repad, using some extra cheap Chinese pads that took almost 8 weeks to deliver. They don't offer a choice of thickness either anyways. So, I'm going to try and make it right with what I have.

At the end of the day, I will probably sell this horn as it's more suite to small hands. With small key touches too!
 
Back in the 20's most of the big manufactors had thier own system when it came to pads. Conn - "Res-O-Pad", Buescher - "Snap-On" ........ The pads were often thick back then. Very thick! To install modern pads on my old Kohlert 1927 was not possible without bending. And I didn't bend. The system on my Kohlert soprano is to work without adhesiv. The screw and washer (the washer was not intended to be a resonator/reflector!) should hold the pad in the keycup. IMO it was supposed to a flexible system. Thick and flexible enough to cover a wrapped tonehole. I think most of uneven rolled toneholes were uneven when the leaved the factory. It's hard to make even rolled toneholes. The best toneholes, when it comes to eveness, is Martin softsoldered toneholes.

A very thick white/grey pad with screw and washer to a Kohlert 1927 model. Original.
kohlertwasherscrew.webp
 
I think most of uneven rolled toneholes were uneven when the leaved the factory. It's hard to make even rolled toneholes.

I didn't mention it, but I filed one of the smaller tone holes. It's so small that I doubt it can be called rolled! But it was uneven and based on where it is located, I can't see how it could have been damaged. I think it was bad from day one.
 
I didn't mention it, but I filed one of the smaller tone holes. It's so small that I doubt it can be called rolled! But it was uneven and based on where it is located, I can't see how it could have been damaged. I think it was bad from day one.

To keep your sax original or to change the contruction? I had two Bueschers TT sopranos. Both late TT sopranos. One with snap-on system and one with modern pads and glued in with shellack. Spuds removed. I sold the original one because the "re-built" was/is a better player. I know a guy who handed in his Conn with rth for an overhaul. It was a saxtech that was more into modern horns so he filled down the toneholes so they became even! The Conn became a better player but ...... ???? Maybe a call before he did the changce? I have some saxes that I borrow to guys that don't have a saxophone. The Eb tone hole on a Dörfler & Jörka tenor w rth is wrapped due to a damaged. Not much. I didn't level the tone hole. I just bent the key cup a little bit and took a thicker pad!!!! But I'm just working on my own saxes.
 
I have gotten into the habit of investing the time it takes to really study and evaluate a saxophone before disassembly. Pad protrusion, key openings, thickness of cork on key feet, strength of springs. bent body, tilted posts, loosely fit keys, etc. are all things give important clues as to how to best approach the work. Once the keys are removed, reading where the tonehole imprints are in the pads gives information about key alignment. It helps when starting out to jot down notes as you notice things as you go along. With a few years experience you just remember them.

One time my apprentice bought a sax he wanted me to help him overhaul and thought he was doing me a favor by completely disassembling it and removing the pads before he brought it to me. I had to tactfully suggest to him that in the future it would be better to let me look a sax over first, and explained why giving the reasons listed above. I felt bad because initially he was so proud of what he had done on his own, but it turned out to be a "teachable moment".
 
I see exactly what you mean and I'm definitely learning from my mistakes. I'm sure it'll take me much longer now to adjust the thinks I missed before disassembly.

I need many more years and horns under my fingers to build that experience. 😳

I've only completed half a dozen repads so far and I must go back on the first two that were never really finished... Starting with vintage horns may not be the best idea.
 
I see exactly what you mean and I'm definitely learning from my mistakes. I'm sure it'll take me much longer now to adjust the thinks I missed before disassembly.

I need many more years and horns under my fingers to build that experience. 😳

I've only completed half a dozen repads so far and I must go back on the first two that were never really finished... Starting with vintage horns may not be the best idea.
Amen to that. I have nearly 20 years experience repairing and overhauling saxophones, and some vintage horns still "kick my butt". For anyone wanting to get into doing saxophone repads I always suggest picking up a YAS-23 to start with. I applaud your ambition and determination but you have chosen some pretty steep hills to climb for someone starting out.
 
I have gotten into the habit of investing the time it takes to really study and evaluate a saxophone before disassembly.

On a similar theme - I always like to see a damaged horn in its unrepaired state. I know this isn't always possible because sometimes players simply have to get the thing at least half-working again, but whenever a fix has been attempted it often covers up valuable 'tells'. These can be helpful in indicating secondary issues - such as poor handling or a problem with the case - as well as giving a sense of the 'blast radius'...as it were.
 
I applaud your ambition and determination but you have chosen some pretty steep hills to climb for someone starting out.

I can't say I chose that route. It kind of chose me.

For anyone wanting to get into doing saxophone repads I always suggest picking up a YAS-23 to start with.

Not my first, but last two before the Hawkes were a YAS-23S and a YTS-23. Much easier...
 
Amen to that. I have nearly 20 years experience repairing and overhauling saxophones, and some vintage horns still "kick my butt". For anyone wanting to get into doing saxophone repads I always suggest picking up a YAS-23 to start with. I applaud your ambition and determination but you have chosen some pretty steep hills to climb for someone starting out.

Likewise, I have to admit to wincing a little when I read about filing a rolled tonehole 🙂.
But another reason repairers tend to advise 'young Jedis' to start with cheapo modern horns is that there are only so many vintage beauties left, and I think it behoves all of us to do whatever we can to preserve the integrity of them.
Sure, it's not always possible - but it's important to recognise the point at which the lack of experience and/or tooling may lead to steps that will compromise the structure of a horn (though this is distinct from the need or desire to preserve 'originality').
Not that I'm knocking the will to have a go (in fact I've always encouraged it) - but knowing what not to do is as much a skill as any other repair technique.

If it's of any consolation, we've all been there - it's just part of the journey, and even this late in my career I'm still re-evaluating techniques and practices I put under my belt decades ago.
 
Likewise, I have to admit to wincing a little when I read about filing a rolled tonehole 🙂.

I would've never done it if it was a real one but it wasn't and the amount of filing was minimal. Just enough to make it look level! It had an ugly dip on one side.

I checked a few holes with metal balls and used to try and improve some uneven holes. But I didn't want to be too brutal without a counter measure inside the tube... It wasn't too bad that it required much leveling anyways.

The vintage horns I worked on are nothing like rare beauties. And I am very conservative in my approach. I can't solder. I'll have to find someone to do this for me and at some stage learn how to do it properly. My last attempt on my YTS-23 worked but is ugly! 😱
 

Similar threads... or are they? Maybe not but they could be worth reading anyway 😀

Social

New! Social Feeds

Look out for the navigation icon:

Follow CafeSaxophone

Latest Song of the Month

Trending

Forum statistics

Topics
32,072
Messages
578,562
Members
8,133
Latest member
walthang
Back
Top Bottom