
 (bottom of page)

CafeSaxophone Forum
Tech/maintenance 1923 Elkhart Band Instrument Company Alto Adventures
I've been working on my eBay Alto basket case project for the past month or so. I'm new to sax repair so not only am I slow, but I learn from my mistakes and I have been learning a lot.
The sax was shipped to me in the original case. Inside the case all of the parts were in a pile of styrofoam peanuts surrounding the body. The neck was inside the bell, wrapped in bubble wrap. The pivot screws were in the body. All rods were in a styrofoam block. I was fortunate that there were no missing parts. Obviously this was someone's pride and joy and one point, but it has seen a number of repairs over the years including some really ugly soldering around the lower key guards. All of the old pads were removed. All of the existing springs were left in place.
I removed all springs and did an ultrasonic tank cleaning of the body, neck, mouthpiece and all keys. Blew out the moisture with compressed air and waited for new pads to arrive from MusicMedic.
The body, neck and keys all cleaned up nice. The engraving on this horn is some of the best I've seen for old eBay offerings.
Last week I finally finished putting everything back together. I still have some work to do on springs and key regulation. My spring work is not great - several are longer than necessary and bent to try to get better padding fit. Most of the keys with hinges were bent out of true and that took me some time to get close. Not perfect, but close enough so that the keys aren't binding. Someone apparently had a fondness for swaging keys and most of these were so tight that they would barely move without removing some material. I don't have the high dollar hinge fitting broaches and I don't want to have to admit it, but I did make use of some flat files and round files to get parts moving. This isn't a Mark VI and if I weren't trying to learn repair on it, it would likely be in a dumpster somewhere.
Leak light test showed need for some improvement, so I spent some time trying to refloat the pads. I had already done some light tone hole leveling and checking key fit before padding. Time for the big moment - I put on a reed and mouthpiece from my current rental Selmer alto and spent some time trying to get some sound out of the old girl. I was not pleased with the results. Mostly high note squeaks and nothing in the low end would play at all. Overall a very stuffy feel to the horn. I had to go back and play my rental Selmer to make sure it wasn't just me - it wasn't. I'm new to learning all things Saxophone but I am able to play the chromatic scale reasonably well to two octaves.
@PigSquealer suggested checking for leaks. Since there was a previous repair to the neck receiver, that seems like a good thing to check. I put a latex glove in the bell, held all keys down and blew (instead of inhaling as suggested). The glove barely inflates before going flat. I ordered a neck leak checker gizmo from MusicMedic and after a little bit of fiddling was able to get it placed in position. A drop of dish soap and some water were added to the receiver and placed the neck and blew. The video tells the sad tale.
Neck Leak Results
Leaks in two places. I saw Matt Stohrer's video showing a neck leak and repairing it using lapping compound to show the areas of the receiver that needed to be fitted better. I'm waiting on a neck tenon expander and some 600 grit lapping compound to arrive from Ferree's. I may not be able to get this repair done without spending the approximately $600 for two specialized pieces of equipment to adjust neck and tenon, but it's worth a shot. Stay tuned!
The sax was shipped to me in the original case. Inside the case all of the parts were in a pile of styrofoam peanuts surrounding the body. The neck was inside the bell, wrapped in bubble wrap. The pivot screws were in the body. All rods were in a styrofoam block. I was fortunate that there were no missing parts. Obviously this was someone's pride and joy and one point, but it has seen a number of repairs over the years including some really ugly soldering around the lower key guards. All of the old pads were removed. All of the existing springs were left in place.
I removed all springs and did an ultrasonic tank cleaning of the body, neck, mouthpiece and all keys. Blew out the moisture with compressed air and waited for new pads to arrive from MusicMedic.
The body, neck and keys all cleaned up nice. The engraving on this horn is some of the best I've seen for old eBay offerings.
Last week I finally finished putting everything back together. I still have some work to do on springs and key regulation. My spring work is not great - several are longer than necessary and bent to try to get better padding fit. Most of the keys with hinges were bent out of true and that took me some time to get close. Not perfect, but close enough so that the keys aren't binding. Someone apparently had a fondness for swaging keys and most of these were so tight that they would barely move without removing some material. I don't have the high dollar hinge fitting broaches and I don't want to have to admit it, but I did make use of some flat files and round files to get parts moving. This isn't a Mark VI and if I weren't trying to learn repair on it, it would likely be in a dumpster somewhere.
Leak light test showed need for some improvement, so I spent some time trying to refloat the pads. I had already done some light tone hole leveling and checking key fit before padding. Time for the big moment - I put on a reed and mouthpiece from my current rental Selmer alto and spent some time trying to get some sound out of the old girl. I was not pleased with the results. Mostly high note squeaks and nothing in the low end would play at all. Overall a very stuffy feel to the horn. I had to go back and play my rental Selmer to make sure it wasn't just me - it wasn't. I'm new to learning all things Saxophone but I am able to play the chromatic scale reasonably well to two octaves.
@PigSquealer suggested checking for leaks. Since there was a previous repair to the neck receiver, that seems like a good thing to check. I put a latex glove in the bell, held all keys down and blew (instead of inhaling as suggested). The glove barely inflates before going flat. I ordered a neck leak checker gizmo from MusicMedic and after a little bit of fiddling was able to get it placed in position. A drop of dish soap and some water were added to the receiver and placed the neck and blew. The video tells the sad tale.
Neck Leak Results
Leaks in two places. I saw Matt Stohrer's video showing a neck leak and repairing it using lapping compound to show the areas of the receiver that needed to be fitted better. I'm waiting on a neck tenon expander and some 600 grit lapping compound to arrive from Ferree's. I may not be able to get this repair done without spending the approximately $600 for two specialized pieces of equipment to adjust neck and tenon, but it's worth a shot. Stay tuned!
39 Replies
·
2010 views

Saxophones Alto for warm tone
Me again!
I'm curious to know - what alto do you think produces the warmest, most mellow tone?
No particular reason for asking just pure curiosity........
I'm curious to know - what alto do you think produces the warmest, most mellow tone?
No particular reason for asking just pure curiosity........
34 Replies
·
499 views
Saxophones The Alphabet of Tone
The Alphabet of Tone
words often encountered when one discusses or expresses an instruments tone....
Bright
Warm
Rich
Dark
Lush
Centered / Focused
Spread
what else have YOU heard?
words often encountered when one discusses or expresses an instruments tone....
Bright
Warm
Rich
Dark
Lush
Centered / Focused
Spread
what else have YOU heard?
4 Replies
·
66 views
Miscellaneous Photography - all aspects
Following various recent posts, I thought I would create a thread specifically for photography. Somewhere to talk about equipment, experiences, processing...
To start off, I was a Nikon user for over 40 years, but had to 'down size' as handling full-frame cameras and lenses was getting to be too much like hard work and giving me shoulder issues. My current digital camera is a mirrorless Fuji X-T5.
For film cameras, I have a Pentax MX, Mamiya RB67, and a Sinar F2.
To start off, I was a Nikon user for over 40 years, but had to 'down size' as handling full-frame cameras and lenses was getting to be too much like hard work and giving me shoulder issues. My current digital camera is a mirrorless Fuji X-T5.
For film cameras, I have a Pentax MX, Mamiya RB67, and a Sinar F2.
424 Replies
·
16474 views


Cafe Moderator
Café Supporter
Miscellaneous Daily Check In
Good morning,
We thought it might be good to have a thread where you can just come and say hi, tell us what you are doing today, have a moan, share an idea that you wouldn't necessarily start a thread for ( we can always create a new thread from posts here if it became a substantial discussion).
It doesn't have to be sax related🙂
Basically an easy way to connect on a daily basis.
So to kick us off, I am writing this whilst prepping a casserole for the slo cooker as I am playing sax today with café sax and need a quick easy tea when I get home.
I am still suffering with a cough which will impact my playing today and I am worried as we are playing our first care home gig next Sunday!!
Have a lovely Sunday
Jx
We thought it might be good to have a thread where you can just come and say hi, tell us what you are doing today, have a moan, share an idea that you wouldn't necessarily start a thread for ( we can always create a new thread from posts here if it became a substantial discussion).
It doesn't have to be sax related🙂
Basically an easy way to connect on a daily basis.
So to kick us off, I am writing this whilst prepping a casserole for the slo cooker as I am playing sax today with café sax and need a quick easy tea when I get home.
I am still suffering with a cough which will impact my playing today and I am worried as we are playing our first care home gig next Sunday!!
Have a lovely Sunday
Jx
2987 Replies
·
96143 views


Cafe Moderator
Cafe Announcements 📣 Testing new feature: Social Feed
As some of you have noticed we are testing a new forum feature that may or may not be made permanent. It is still under development so any critique, bug reports are welcome.
This is a different way of viewing recent posts, in a social media type view. This is never going to replace the existing traditional forum / subforum and new posts view, rather it's an alternative if you like that kind of view. So we don't need need an opinion on the feature itself. In fact I don't really like it myself. The reason is to make the forum more familiar and hopefully less perplexing for new users who may be used to this type of view but not the traditional forum format.
Currently the access to Social Feed is a sub menu item of New (along with the various different New views). You can also switch back and forth between the SF view and trad view via a link at the top of each thread. Social Feeds shows the latest started or replied to threads showing the first post and latest two or three replies. The Load More Replies link opens up each thread to show all replies (but we may reduce that to 10 or so at a time)
If you reply to a post in SF format it will show as "nested" but when viewing the same post in traditional view it will have the post it is replying to as a quote. (or rather, it should do with any luck)
Please supply any comments in this thread, so not interrupt normal threads with comments about the Social Feeds system.
Again: this is totally optional and will not replace any current view so we won't be taking a poll on whether you like/want it or not.
What will be most useful is if those of you who are used to this kind of feed with social media can comment in this thread which may be sticky for a while
This is a different way of viewing recent posts, in a social media type view. This is never going to replace the existing traditional forum / subforum and new posts view, rather it's an alternative if you like that kind of view. So we don't need need an opinion on the feature itself. In fact I don't really like it myself. The reason is to make the forum more familiar and hopefully less perplexing for new users who may be used to this type of view but not the traditional forum format.
Currently the access to Social Feed is a sub menu item of New (along with the various different New views). You can also switch back and forth between the SF view and trad view via a link at the top of each thread. Social Feeds shows the latest started or replied to threads showing the first post and latest two or three replies. The Load More Replies link opens up each thread to show all replies (but we may reduce that to 10 or so at a time)
If you reply to a post in SF format it will show as "nested" but when viewing the same post in traditional view it will have the post it is replying to as a quote. (or rather, it should do with any luck)
Please supply any comments in this thread, so not interrupt normal threads with comments about the Social Feeds system.
Again: this is totally optional and will not replace any current view so we won't be taking a poll on whether you like/want it or not.
What will be most useful is if those of you who are used to this kind of feed with social media can comment in this thread which may be sticky for a while
Do you use the social feed?
10 votes total
31 Replies
·
2099 views

I found this ancient Otto Langey Saxophone Fingering Chart, circa 1890, inside the case of a 1921 C Melody sax. The condition is poor, but it's still a cool find. I gather it's a fingering chart for those transitioning from the "older" 12-key saxophone to the "newer" 15-key layout. I don't see a date on this anywhere, so the 1890 guess came from the PC.
13 Replies
·
281 views

Saxophones Trying to date my Amati Kraslice Tenor
Hi everyone!
A coworker's grandma passed away and her family passed her Amati Kraslice Tenor on to me.
It looks quite old (for example: the whole thing is silber, but the inside of the bell is gold), but me and my friends didn't have any luck finding something with the serial number.
The serial number is: 43826
I've added some photos, maybe this will help 🙂
Thanks already!!
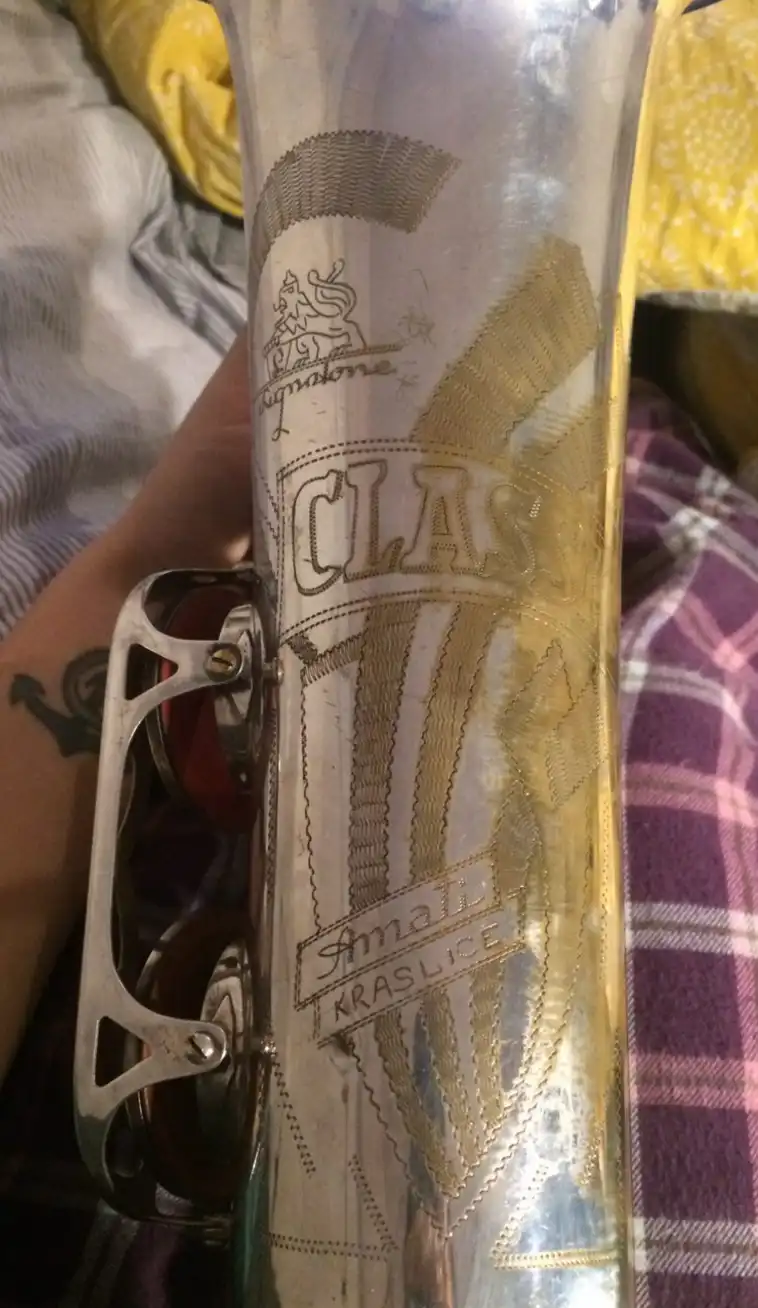
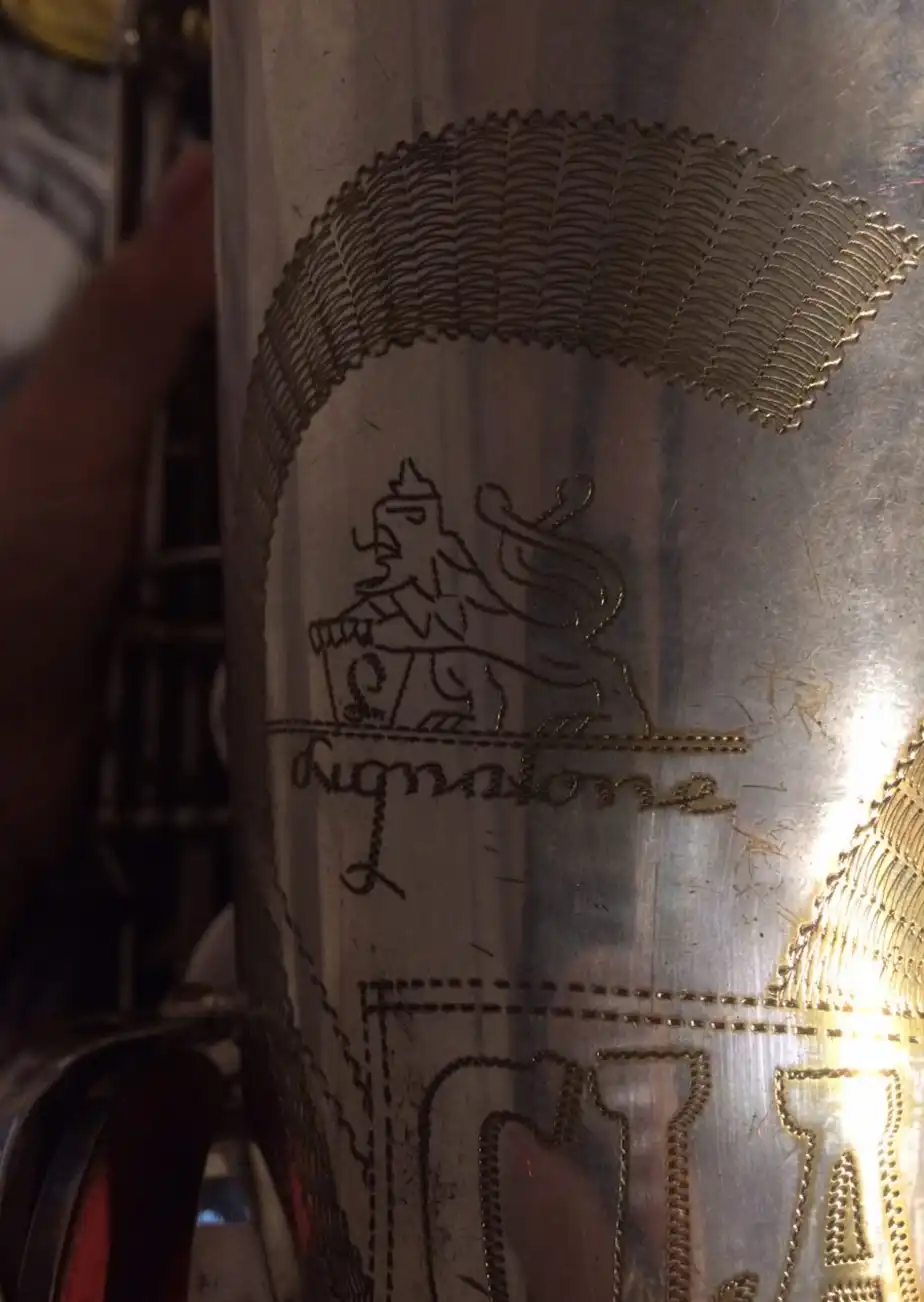
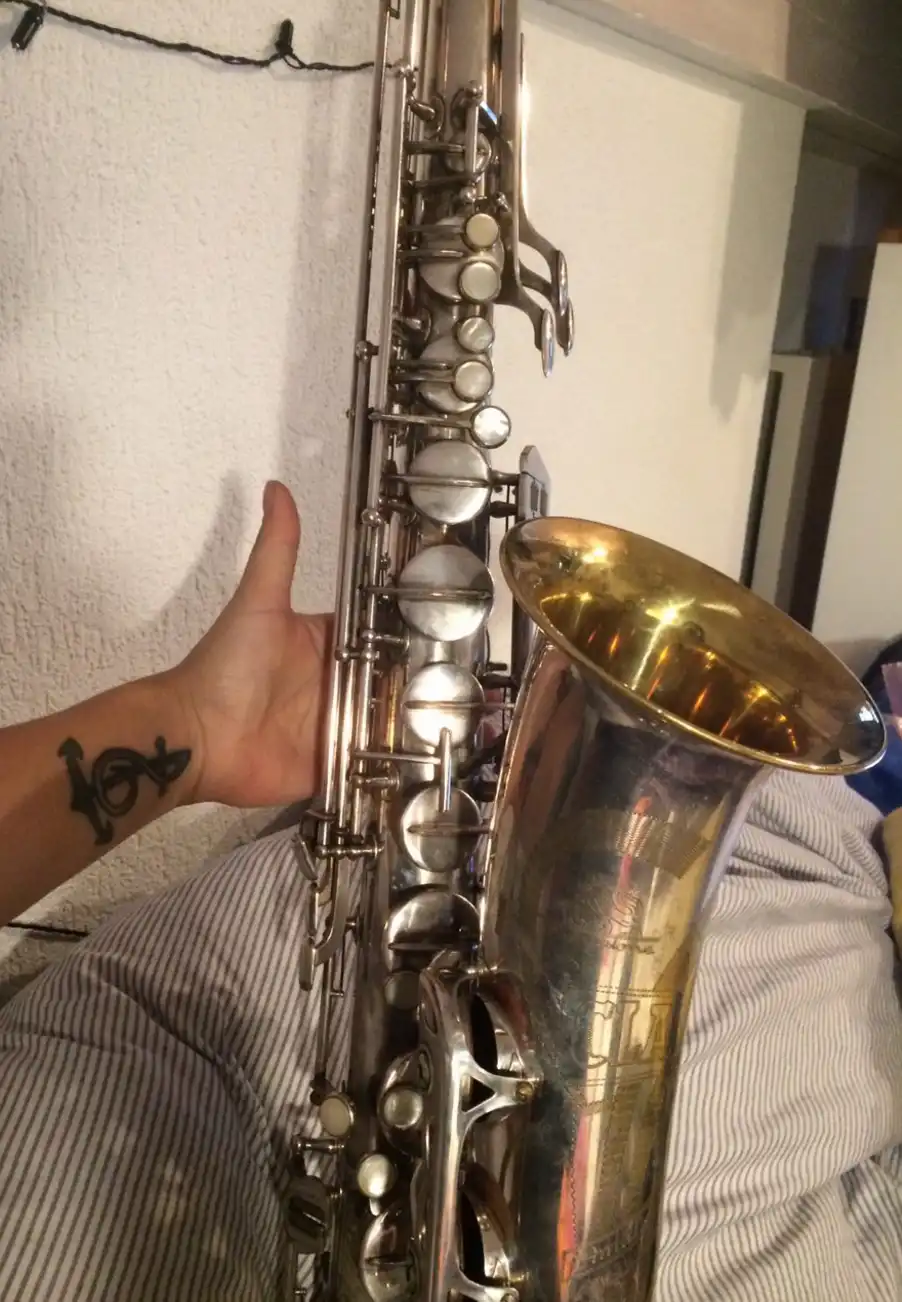
A coworker's grandma passed away and her family passed her Amati Kraslice Tenor on to me.
It looks quite old (for example: the whole thing is silber, but the inside of the bell is gold), but me and my friends didn't have any luck finding something with the serial number.
The serial number is: 43826
I've added some photos, maybe this will help 🙂
Thanks already!!
16 Replies
·
9943 views

Saxophones Franken-sax?
My primary instrument is Tuba. Among tuba players there are quite a few who build what are called Franken-Tuba's. Basically we find old junk, sometimes buy new components, and build homemade conglomerations.
Is this a thing in the saxophone community?
Is this a thing in the saxophone community?
14 Replies
·
275 views

Tech/maintenance Super glued pads - a cry for help
Hello, folks. Many of you may know me from that other site.
A while back, I bought a nice, shiny purple logo Yts-32 from a guy in Japan. It arrived unplayable due to leaks. No prob, I think. I'll fix 'er right up. Wrong again.
The pads are glued in with ca glue. Lots of it, filling the cups. It is very hard and thick. I have scraped out a couple of pad cups. It was a long, tedious drudge. Acetone barely softens the surface.
Is there a better way?
A while back, I bought a nice, shiny purple logo Yts-32 from a guy in Japan. It arrived unplayable due to leaks. No prob, I think. I'll fix 'er right up. Wrong again.
The pads are glued in with ca glue. Lots of it, filling the cups. It is very hard and thick. I have scraped out a couple of pad cups. It was a long, tedious drudge. Acetone barely softens the surface.
Is there a better way?
33 Replies
·
453 views
Saxophones Pork Tales: Saxophone Repair DIY Adventures.
Tales from a pig that likes to stick his nose into everything.
Paint that S. How difficult could it be ?

1) Search the net.
2) Find the color.
3) Order color.
4) Study task on University of YouTube, aka; For destruction by DYI presented by pro tech.


Do the cleaning & prep.

Paint and cleanup / detail the edges with hard cotton swabs. Sounds easy……

Yeah tha guy Matt makes it look easy.
Anyone remember your first experience cooking bacon crispy while still in the frying pan !
Paint that S. How difficult could it be ?
1) Search the net.
2) Find the color.
3) Order color.
4) Study task on University of YouTube, aka; For destruction by DYI presented by pro tech.
Do the cleaning & prep.
Paint and cleanup / detail the edges with hard cotton swabs. Sounds easy……
Yeah tha guy Matt makes it look easy.
Anyone remember your first experience cooking bacon crispy while still in the frying pan !
1248 Replies
·
73771 views


Recipes What's Cookin'?
This is the one for pictures of food. Time for Superbowl chili!
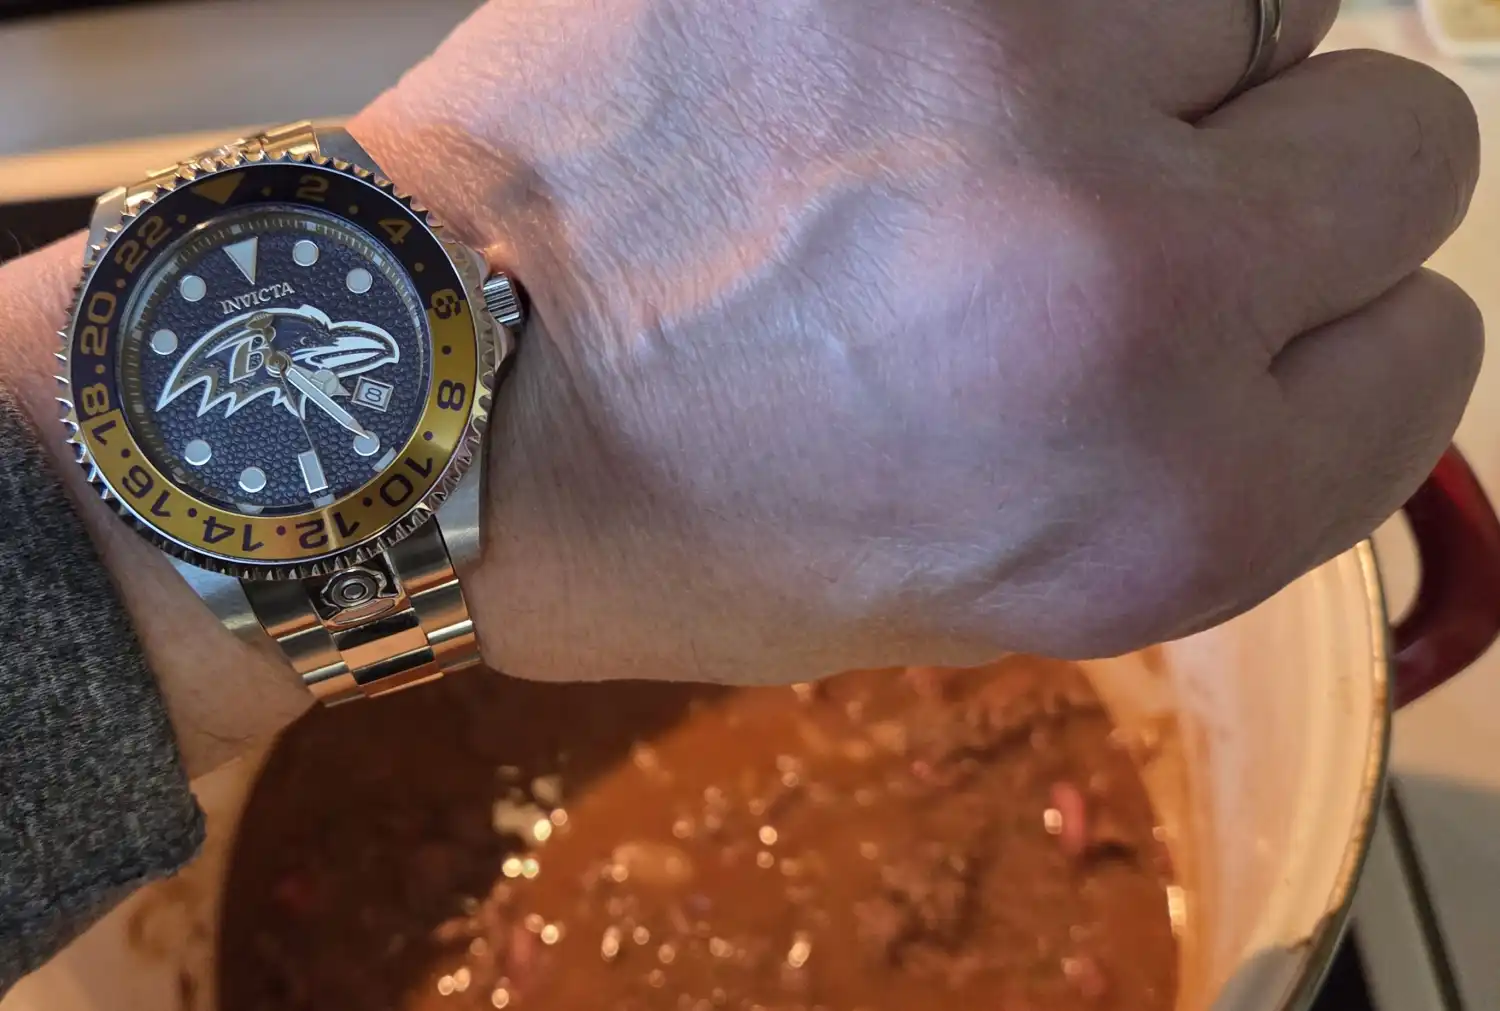
I make it every year for the game, whether I watch it or not. In a pot I actually won... at a chili contest.
Now how 'bout a bowl of red:
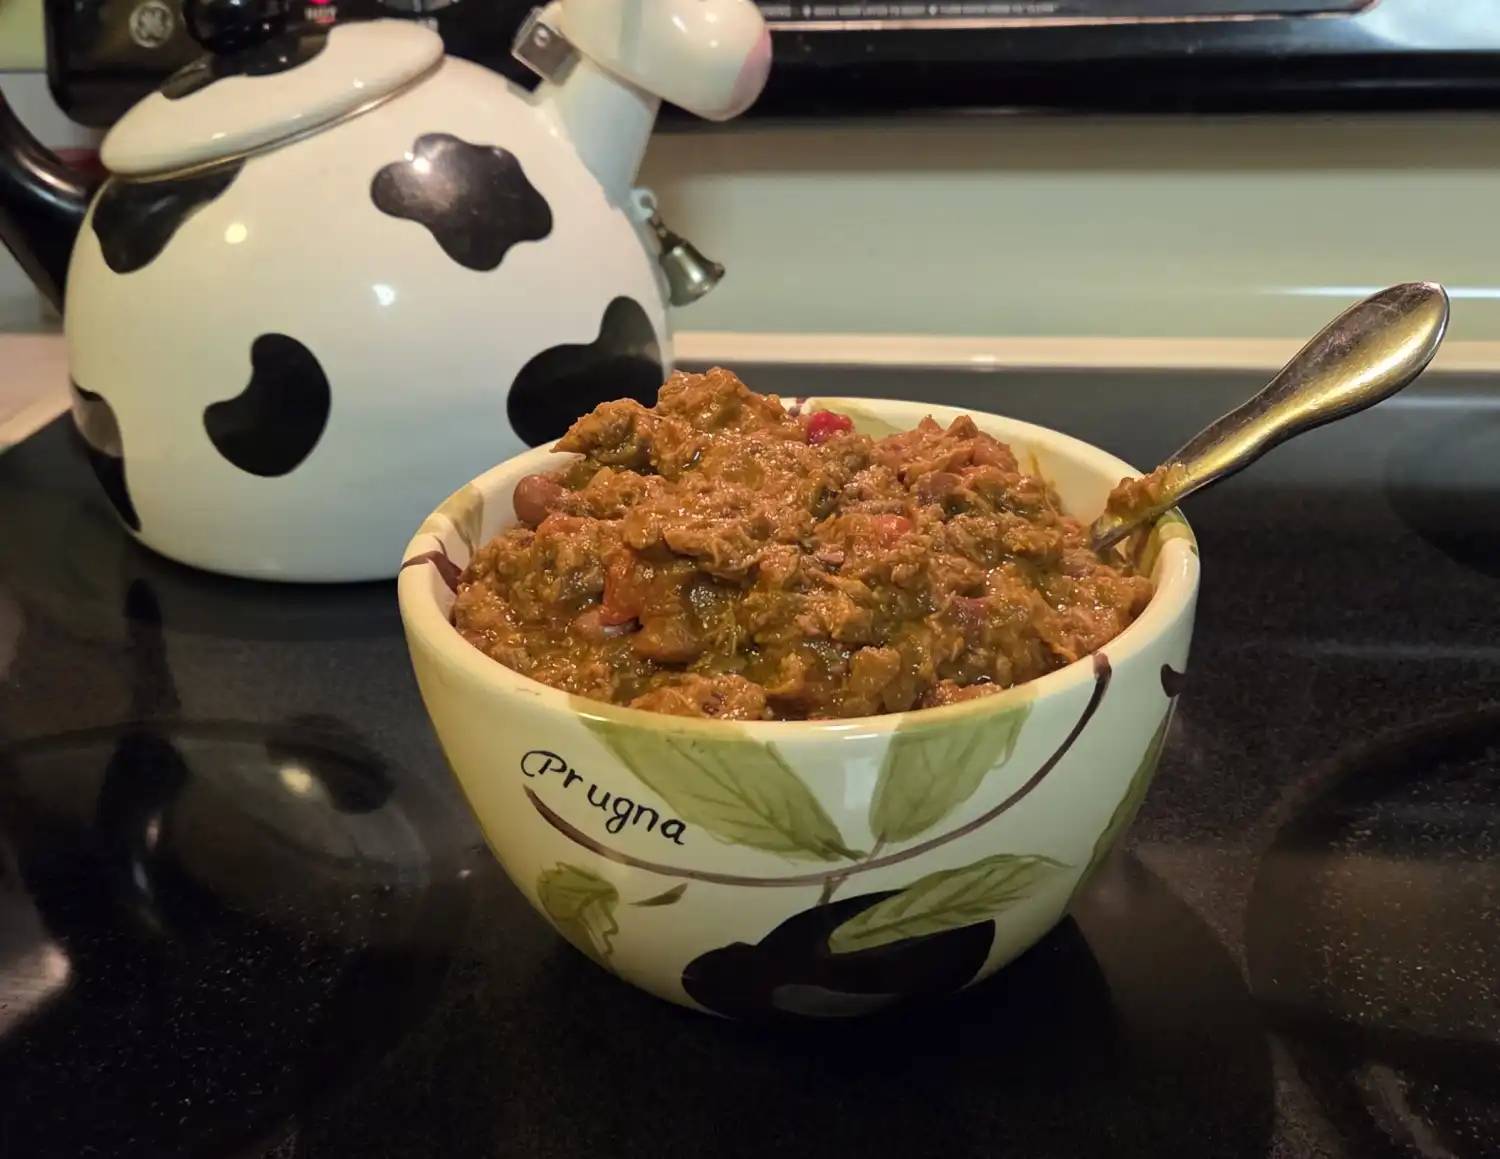
I make it every year for the game, whether I watch it or not. In a pot I actually won... at a chili contest.
Now how 'bout a bowl of red:
169 Replies
·
9539 views
Great Players Who sparked your love of Sax music
As an aside to Bobby's "first album' thread... I am curious to know which golden moment made you think "Now there's an instrument I fancy having a go at"
For me it was Tex Beneke. My parents used to play a lot of Glenn Miller when I was growing up. It was the only music I knew as a kid: big band stuff. Then I became a teenager and discovered Dick Parry's voice on Dark Side of the Moon, and thought "ok, this might be fun" After Dick it was Didier Malherbe from Gong and then my mate played me Charlie Parker and I was fully hooked!
For me it was Tex Beneke. My parents used to play a lot of Glenn Miller when I was growing up. It was the only music I knew as a kid: big band stuff. Then I became a teenager and discovered Dick Parry's voice on Dark Side of the Moon, and thought "ok, this might be fun" After Dick it was Didier Malherbe from Gong and then my mate played me Charlie Parker and I was fully hooked!
625 Replies
·
114703 views

I'm wondering if anyone's noticed a change in the consistency of Vandoren Java Red reeds recently? My last two boxes have been noticeably substandard, with the last box not having a single, decent reed in it. Resistance has increased noticeably and the sound is much less bright. I swapped in an old Red and it was great.
It feels like they've changed how they gauge the Reds, or changed the design slightly. Is it just me or has anyone had this recently?
It feels like they've changed how they gauge the Reds, or changed the design slightly. Is it just me or has anyone had this recently?
16 Replies
·
334 views
Saxophones Galasso
Olá, meu nome é Rodrigo. Eu toco saxofone tenor. Tenho um saxofone tenor Galasso — é um modelo antigo, mas muito bom. Podemos conversar sobre o saxofone?
39 Replies
·
945 views
Social


Latest Song of the Month
-
 SOTM November 26 SOTM - Footprints - Wayne Shorter
- Started by sax panther
- Replies: 8
-
-
 SOTM SotM September 2026 - Autumn Leaves
- Started by mrblackbat
- Replies: 27
-

-

-
 SOTM SOTM June 2026 "And You Just Smile" (from ear to ear- training)
- Started by LostCircuits
- Replies: 11
-
 SOTM SOTM May 2026 - Always Remember Us This Way
- Started by MikeMorrell
- Replies: 39
-
 SOTM SOTM April 2026 - Freedom Jazz Dance
- Started by rhysonsax
- Replies: 14
-
SOTM SOTM and PETE (Play by Ear Training Exercise)
- Started by Wade Cornell
- Replies: 16
-
SOTM SOTM Feb 2026 - On Green Dolphin Street
- Started by mrblackbat
- Replies: 44
-
 SOTM SOTM January 2026: Our Love Is Here to Stay
- Started by GCinCT
- Replies: 46
-
SOTM SOTM December 2025: Wexford Carol
- Started by MikeMorrell
- Replies: 37
Member Blogs (currently active)
-
 Saxophones Pork Tales: Saxophone Repair DIY Adventures.
- Started by PigSquealer
- Replies: 1K
-

-
Trending


Popular Discussions
-
 Great Players Who sparked your love of Sax music
- Started by jools
- Replies: 625
-
 Playing the saxophone The Cafe Trio grown to Octet down to Sextet
- Started by trimmy
- Replies: 846
-
 Theory & Impro Do we really need theory?
- Started by jbtsax
- Replies: 507
-
 Saxophones C Melody Saxophones
- Started by Andy Hornblower
- Replies: 706
-
 Saxophones Carrying a tenor on a (motor)bike?
- Started by Jay
- Replies: 779
-
 Saxophones How will Tariffs affect Sax Prices?
- Started by Ivan
- Replies: 465
-

-
 Playing the saxophone Learn to play by ear or by reading music
- Started by Taz
- Replies: 1K
-
 Tech/maintenance My new "DIY" pads...
- Started by DavidUK
- Replies: 393
-
Misc Reviews Yamaha YDS-150 Wind Synth
- Started by Acc6441
- Replies: 301