
• New!

    Try our new Social Feeds, look out for the navigation icon: . You can now set default social feed view in your account preferences.

Tech/maintenance A general thread on DIY repair

Learn to count how long you hold the heat on or on & off. The flame setting and distance away from the part. Most 100% natural dewaxed shellac turns into plastic state around 130°/55°c. Molten at 150°/66°c and liquid by 175°/79°c.
Bubbles, it’s burning and beyond liquid state.
Furniture burn-in sticks can work if natural and dewaxed.

Heat the cup just enough for the pad to release (on lacquer). No telling what material was used 35+ years ago.
Clean the cup out best you can.
I’m not fond of shellacking the cup on pads larger than octave pads. Heat cup and smear stick around…can leave you with strings all over the keywork. Preheat the stick if you must.
Flakes in cup are great until they’re no longer in the cup. Use an alcohol lamp.

Palm keypads I install two different ways. Lacquer or silver, plastic or metal booster.
Metal I apply to pad. Plastic to cup.
Dry fit the pad.
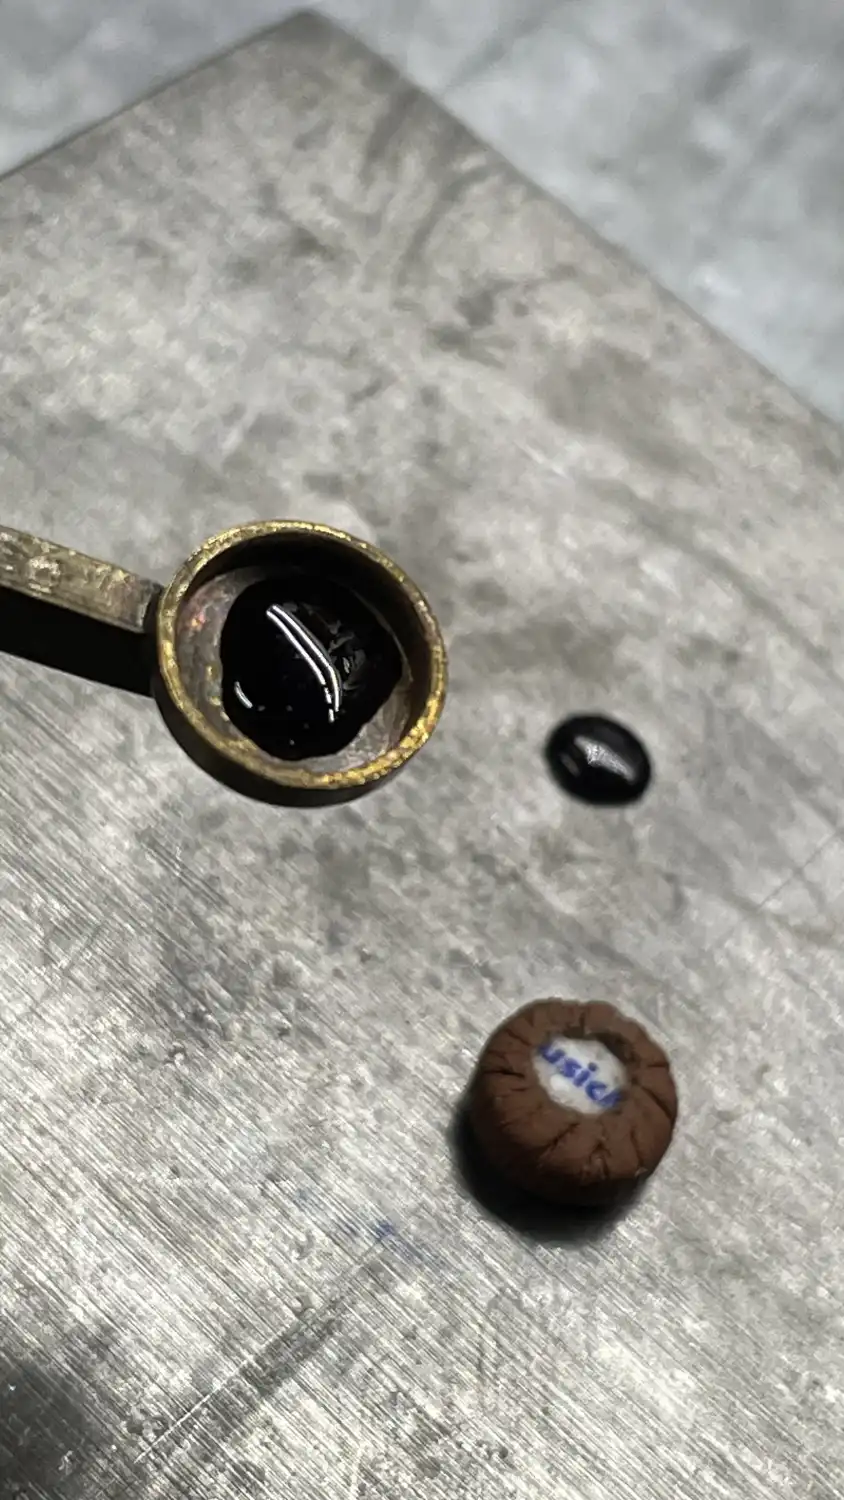
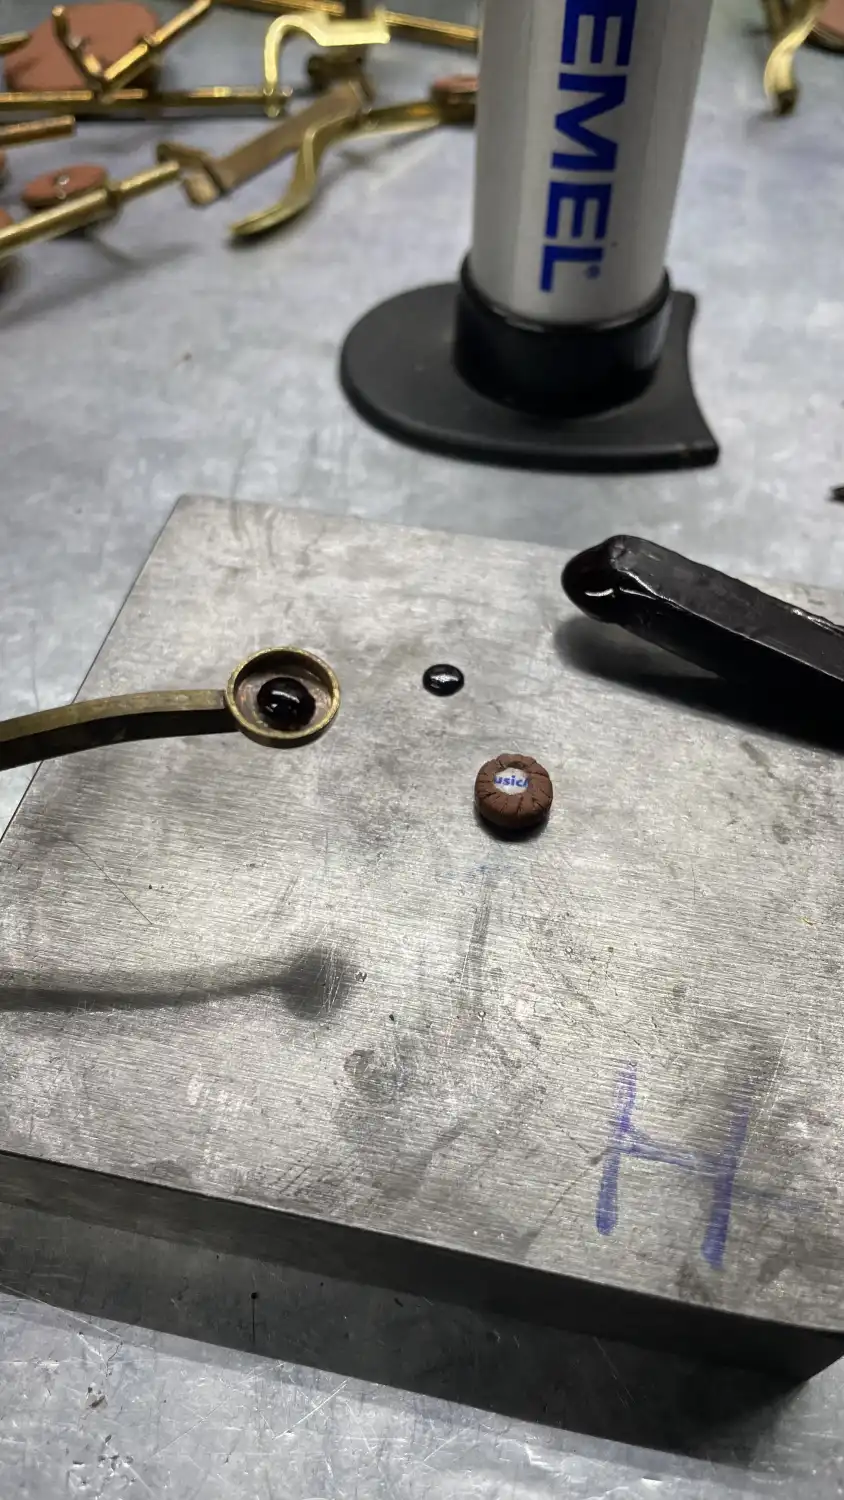
Heat your shellac and make some beads / drops.
Add bead(s) to cup. Heat cup and shellac until flow is seen. Drop pad in and level. Don’t squish it in. Leaving I bit of float / wiggle room on final.
1765134032978.webp

1765134103781.webp
 
Thanks PS - I'm using an electric heat gun. We'll see if it is hot enough for reassembly - if not, I'll have to experiment carefully with a flame.

I got happily engrossed this afternoon cleaning and polishing everything, even after a heart-sinking 'boing' saw all the bits of the main LH keywork spring all over the table. Thankfully I am indoors in the clean and warm, not in the shed amongst piles of swarf and rubbish - and all the bits were found. Even better, I worked out what they all were, and didn't have to call my daughter (who is studying biology) in order to find out how to grow extra fingers to get it all back together.

And best of all - it seems the high E side-key has to go on before all that LH keywork - so I get to practice and do it all again 🙂

It's a shame I can't take pictures. The thing was dull and black in places, but has come up really nice. Silver plate is gone in a few places, but mostly it is as I remember it, a very long time ago.

Any tips for things to gently clean slightly-crusty-but-intact pads with?
 
Remember what your LH /RH plays. What your fingers touch. Group the parts. Then hold them to body to confirm location.
Sequence is another completely different game. My best suggestion is to think in groups that are layered. High E & F, bridge to front F and palm keys sometimes go in before upper stack.
1765144253858.webp

Any tips for things to gently clean slightly-crusty-but-intact pads with?
Lemon pledge.
 
😀😀 Well OP. As a vintage motorcycle restorer myself I found that the skills I already have come in very useful when starting (YOUR OWN) sax repairs. I have been down this road for quite a while now and do all my own rebuilds. As stated earlier, before you "have a go" look at Matt Storher , Wes and everything you can find online..These helped me tremendously and we should all be very grateful to these techs who selflessly share their hard earned experience with us. Of course you will make mistakes but that's how you learn.. Have fun mate and here is a good tip (no charge).. When you eventually take your sax to pieces REMEMBER to put corks on the extremely sharp springs. Once you have impaled your fingers a few times you will remember as the searing pain will remind you!! Good luck.. 😉😉
 
Good going, @mark_addy . Fact you are handy with your hands on motorcycles is a good step toward sax repair success. I wrench on my own motorcycles.

I am certainly no pro at this, walking in the same footsteps as you but earlier. For a long time have done my own minor repairs, replacing bad pads here and there, missing corks and felts, etc.

Then bought a fixer-upper low Bb bari sax for $315 US in 2011 with shipping included. It was a 1952'ish Model 37 Beaugnier Vito. I show photos before and after in this post:


The sax above needed a lot of TLC. It had good pads, but looked like it must have fallen off a stadium's bleachers a couple times as it had many dings, dents, crooked key racks and etc. Just plugging away I pounded away the dents, straightened the racks and fixed the pad heights, many which were set way too high. Now it plays well in tune, but needs addititional TLC with a repad job. It fell by the hands of others at home not long ago, separating bell brace attachment. So now I have additional challenges ahead of me.

Did my first repad job on a late 1980's Le Blanc Vito 7133T tenor by Jupiter. Didn't have a leak light, side lined it using my other tenor. Recently sent it in to be serviced. Tarpley Music corrected the leaks, and a few other minor things for $151 US. So they didn't see anything wrong with the repad itself overall.

So essentially I got a full overhaul for $60 in pads (bought through EBay from China before all the tariff noise) and parts plus the servicing, under $220 for a minimum $600 repad. It is now my favorite tenor as it has such a beautiful subtone in its lower register.

Keep us posted on your progress! 😀
 
😀😀 Well OP. As a vintage motorcycle restorer myself I found that the skills I already have come in very useful when starting (YOUR OWN) sax repairs. I have been down this road for quite a while now and do all my own rebuilds. As stated earlier, before you "have a go" look at Matt Storher , Wes and everything you can find online..These helped me tremendously and we should all be very grateful to these techs who selflessly share their hard earned experience with us. Of course you will make mistakes but that's how you learn.. Have fun mate and here is a good tip (no charge).. When you eventually take your sax to pieces REMEMBER to put corks on the extremely sharp springs. Once you have impaled your fingers a few times you will remember as the searing pain will remind you!! Good luck.. 😉😉
Motorcycles have taught me more skills than anything. Like communication skills. Out on a cross country trip I planned a tire change. I asked if the shop had a mechanic, tire machine and tires. “Yes, and we’re open all day Saturday “ was the response.
The mechanic went home at noon. They didn’t have a lift ! 🤦‍♂️ At 1300 I did the tire change myself.
1765167377744.webp


To avoid being pricked by the needle springs. I only handle a body by the bell or bell rim / end.
Cleaning, don’t put your fingers in places they don’t belong. Use a tool.
Mistakes, that’s a thick notebook.
A expert is someone who’s made enough mistakes to know the difference.
I’m writing less notes these days.
I agree. Learning is just that ! Study everything you can get your hands on !! Very sage advice ! The best advice I’ve ever received was free.
My best suggestion is to review a task. Study all the options best one can. Give it your best shot.
Not everything makes sense until you live it.
 
Well, thanks for your interest folks, even though I am very slow with this - too much else is going wrong. Since there are others here who share some of the same mechanical interests, one of the things going wrong is this:

View: https://www.facebook.com/watch/?v=1490928692063094&rdid=rmPNnMUTB7eiwGso


Too cold, dark and wet to do much about it at the moment, hence the saxophone progress. (E is back in place, and luckily there is no F to worry about, and the palm keys were self-contained. There was a tiny stamping with a pat date on the octave mechanism which was interesting, which I hadn't seen before having never cleaned it!).

There's a lot more old mechanical rubbish on those facebook pages, which are for our engine museum here near Manchester. Some of it even works.
 
While it is apart, I notice two torn pads (though it plays OK for now). Are there views on here about the merits of single pads from apparently reputable suppliers, vs much cheaper whole sets from China on ebay? I mean, I know what views I might expect, but sometimes things are not as they seem, and if cheap ones are no good (like hacksaw blades and those skinny angle-grinder disks, from experience) it would be nice to know 'bad in what way'. Thanks folks.
It depends. There are pads with stand alone keys that are easy to change. The main stack and octave pads have complicated relations and it is recommended to get some experience on the stand alone's first. In the main stack you can recognize that a motorbike is engineered and a saxophone is grown like a tree bearing compromises.
 
Thanks PS - I'm using an electric heat gun. We'll see if it is hot enough for reassembly - if not, I'll have to experiment carefully with a flame.
Professional techs almost always use an open flame for floating pads. They can do this without burning lacquer, or setting the leather on fire, or just overheating everything, because they do it all the time.

I float a couple pads a year. Every so often I repad a whole pump, so 18-20 pads maybe over the course of a few days. I don't have enough time at the bench floating pads to be confident with an open flame, so I use a hot air gun with a wee nozzle on the end to concentrate the hot air. It's slower, but safer. I don't have to minimize labor hours on my jobs.
 
That's helpful, thanks. How small is your wee nozzle? My glorified shed hairdryer goes down to about 3/4" at the mo but I could make something up to suit - round, I guess, rather than a flat flare?
 
I have one of those electric heat guns, use it to shrink heat sensitive tubing around electrical wires, component and connector pins as an insulator for electric safety. Paid around $12 US from Harbor Freight. Works great on pad cups.

Did the same thing @PigSquealer did with glue gun sticks, cut them into small pieces instead of spending more for glue pellets. That was a couple years ago on my tenor, worked great for floating pads.

Although I didn't decrease nozzle size. Might not work for fine work like clarinet and flute pads. I have a 100 Watt soldering iron. Haven't tried it but maybe worth experimenting on one of my budget clarinets that I have little to lose on.

I certainly wouldn't try that if I had a Mazak (zinc metallurgy) keyed Boosey & Hawkes clarinet. Can't say, but I'd think those would be one-shot clarinets. (B&H during post World War 2 years resorted to Mazak metal initially - I heard due to metal availability shortages.)
 
The Quick 957DW, has a 3mm nozzle.
We used alcohol lamps, back around '59.

Have read that cutting the tip off, on a soldering gun, touching the two prongs to metal, then pulling the trigger, will heat up the metal. Advised to release the trigger, before removing the prongs, to prevent arcing.
A poor person's version of the expensive model.
 
I have one of those electric heat guns, use it to shrink heat sensitive tubing around electrical wires, component and connector pins as an insulator for electric safety. Paid around $12 US from Harbor Freight. Works great on pad cups.

Did the same thing @PigSquealer did with glue gun sticks, cut them into small pieces instead of spending more for glue pellets. That was a couple years ago on my tenor, worked great for floating pads.

Although I didn't decrease nozzle size. Might not work for fine work like clarinet and flute pads. I have a 100 Watt soldering iron. Haven't tried it but maybe worth experimenting on one of my budget clarinets that I have little to lose on.

I certainly wouldn't try that if I had a Mazak (zinc metallurgy) keyed Boosey & Hawkes clarinet. Can't say, but I'd think those would be one-shot clarinets. (B&H during post World War 2 years resorted to Mazak metal initially - I heard due to metal availability shortages.)
Mazak is strange stuff - 'Atlas' lathe change gears are made of it, and it is not entirely robust. The stuff which turns up in old radios and especially tape recorder flywheels sometimes suffers from so-called zinc pest and just falls apart all on its own. '...Where moth and rust doth corrupt...' 🙂


Edit - and a 3mm nozzle! I think my heat gun would burn out if I tried to throttle it down that much. But there is something like that at work used for plastic welding, perhaps I can borrow it.

Edit again - PP, that's not the strangest use I have heard of for a soldering gun (but I'll try it). I have a friend who drives lorries, and who is familiar with re-cutting tread on lorry tyres, who might have (!) used one to make a tool to recut tyres on his motorbike. In his favour, he grew up under communism where extreme economy was a (serious) matter of everyday life.
 
That's helpful, thanks. How small is your wee nozzle? My glorified shed hairdryer goes down to about 3/4" at the mo but I could make something up to suit - round, I guess, rather than a flat flare?
Most techs use this model.

I use the 8mm tip. Always have fan at maximum. Settings 150°/65°c, 180°/82°c, 320°/160°c. Hold the tip 5mm off the surface.
At the second setting it takes a count of about 30-35 for a 25mm pad to loosen. This by lifting from pads edge with a needle pin tool.
If working on an assembled sax. Shield anything close with wrinkled foil loosely attached.

Notice these 50 year old pads came out cleanly. The shellac reached molten, not liquid state. A small amount of force to lift out was needed.
1765230578309.webp
 
Neat, thanks. I'll see how I go on with either my hot air thing, or the thing from work since I only have two pads to do. Temps are useful as I can experiment with shellac (when it comes), a bit of scrap brass about the right size, and one of those point-and-squirt non contact thermometers. The second pad I took out behaved (and looks) rather like those you show above. Actually, I guess I can play putting it in and out again.
 
I guess I can play putting it in and out again.
Be aware that old shellac has a completely different character than a fresh shellac. I don’t know what causes this. I’ve had old horns (pre 1950) that the material was rock hard. Heat practically did nothing. I clean the cups 100% of any old goo. WWII era repairs were done with some funky brown goo. This is often incompatible with real shellac. I had shellacked a pad back. Heated cup and tossed the pad in. Next thing I know there’s this foaming volcano thing happening. Big freaking mess.
Still it’s worth trying to practice an install.
 
Did the same thing @PigSquealer did with glue gun sticks, cut them into small pieces instead of spending more for glue pellets. That was a couple years ago on my tenor, worked great for floating pads.
Works great until you have too much, spill or drop on outside of part. It’s nearly impossible to clean off anything. Trying to go back to shellac is extremely challenging. Shellac doesn’t stick to HMG.
Most HMG has low melt point. Bad for High School marching bands.
 

Similar threads... or are they? Maybe not but they could be worth reading anyway 😀

Trending

Forum statistics

Topics
32,297
Messages
577,144
Members
8,094
Latest member
RocknJ
Back
Top Bottom